

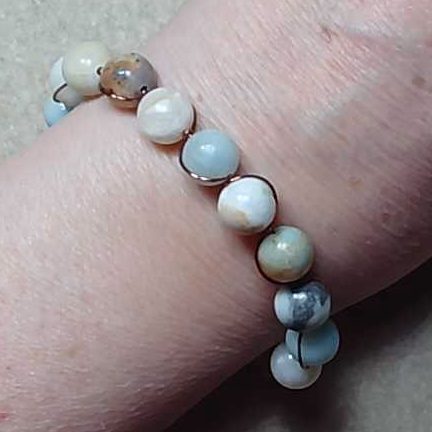
I love stones and easy-to-wear bracelets. While I’m not a wire worker, I do like to make simple projects. This is one of those projects!
The bracelet is done using one piece of wire. I find 22 gauge ParaWire works very well; it is pliable enough to easily wrap yet has enough hardness to maintain a shape. I’ve used 10mm round stone beads, but you can also use the same size pearls, druks, fire-polish or regular glass beads. Make it longer, for a collar-length necklace.
Let’s get started!

This project takes a surprising amount of wire. I have a 6.25″ wrist and I recommend that you cut a 36″ piece of wire. If your wrist is larger, add a 3 – 4.5″ inches to the wire you cut. I cut a shorter piece of wire, and it got very, very short.
Remember to account for the length of your clasp. I like the simplicity of magnetic clasps.
Take your wrist size and add about 3″ and measure that distance from one end of the wire (I measured off 10″). At that point, create a wrapped loop; you only need two wraps to secure the loop.
The shorter portion of the wire is what I’m calling the ‘bracelet’ wire; the longer portion is the ‘wrap’ wire.


Slide one bead onto the ‘bracelet’ wire and snug it up against the wrapped loop.
Using the ‘wrap’ wire, wrap it around one half of the bead, as shown.
Secure the bead and the wire with one full wrap of the ‘wrap’ wire. Take your time; there’s no rush in doing this.


Add another bead and snug it up against the previous bead.
Wrap the wire around one half of the bead and secure it with a full wrap of the wire.
Notice that your ‘wrap’ wire snakes around the beads.

Continue to add beads, securing them using the ‘wrap’ wire.
Go ahead and make any shaping adjustments to your beads and wire; the 22ga wire is very forgiving and easily molded.


Once you’ve reached the length of beads you need, it is time to finish off the ‘wrap’ wire with a final wrap to secure the last bead. As you can see my ‘wrap’ wire got very short, but fortunately I had enough to finish the length I needed!
Once secured, trim any extra ‘wrap’ wire close to the wrap.


Now to end our ‘bracelet’ wire.
Create a wrapped loop close to the final bead and trim any excess wire.


Attach the clasp to the wrapped loops using 6mm jump rings.
Bend and mold the bracelet as you wish. I like making it more oval than round.
That’s all there is to it – enjoy your bracelet!

I encourage you to personalize your project using other types of beads or stones and coordinating it with your own choice of wire colours.
Components:
22ga Parawire, Antique Copper (you can also use 22ga Artistic natural copper wire)
10mm round stone beads, Amazonite
Two 6mm jump rings (I used twisted square, bright copper)
6mm Flat Round Magnetic Clasp, bright copper, or any clasp of your choice